
Super Simple Miter Saw Station
I moved to Vermont a few months ago and I’m getting my new shop set up. The first project I wanted to complete was getting a miter saw station set up along this long wall.

I really like to start many of my projects in Fusion 360. It helps me visualize and work out how I’m going to build things before I even go in the shop. It also helps me during the build to get my dimensions for cutting material. This table design can be used for any purpose.

Click here to download the Fusion 360 design file where you can edit the dimensions and build your own.
I started by cutting the longest pieces that will be the stretchers of the work table. For this next step I’ve got 8 pieces that are all the same length, they’re 35” long. One of the reasons you want a miter saw station is so you can set up a stop block to make repeatable cuts so that all your lumber ends up the same length.

I’ve got all the wood cut at this point and the next step will be to assemble the top and bottom of each table. I got tired of measuring the same two spots for drilling holes, so I made this quick jig that I could slap down anywhere and pre-drill the holes where I wanted screws to go.

I’ve now finished the top and bottom section of the table. Now I need to tie them together by assembling the legs.

At this point I’ve finished screwing together the 2’x4’s. This is going to be the left table of the miter saw station. The last thing to do is to put on a sheet of plywood and I’ll top that off with a layer of hardboard.
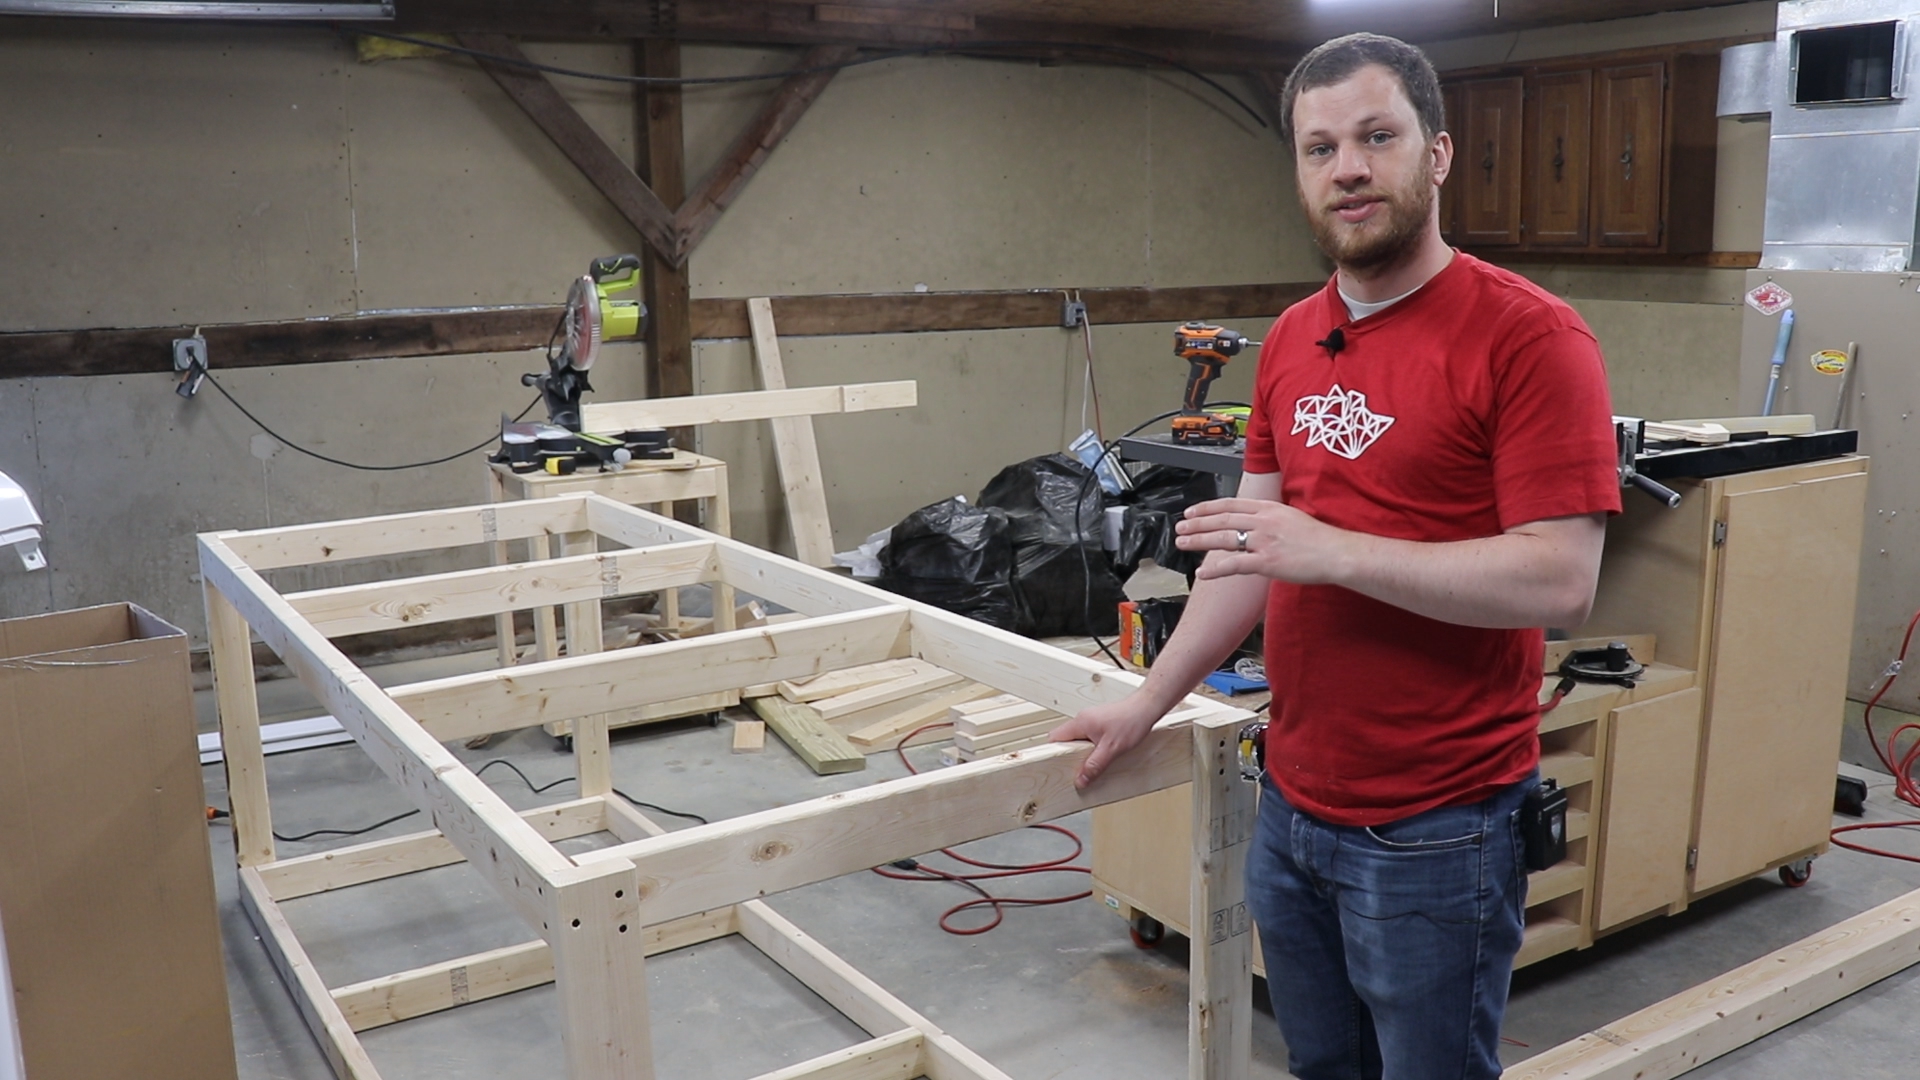


So at this point I’m done building the left side of the table now it’s time to move onto the right side. This one is going to be identical to the first except that it’s going to be a little bit shorter.

As I got started on the right side, I got a call from my wife saying that there were a bunch of cows in our driveway! Here’s a quick little shot of what just went down.

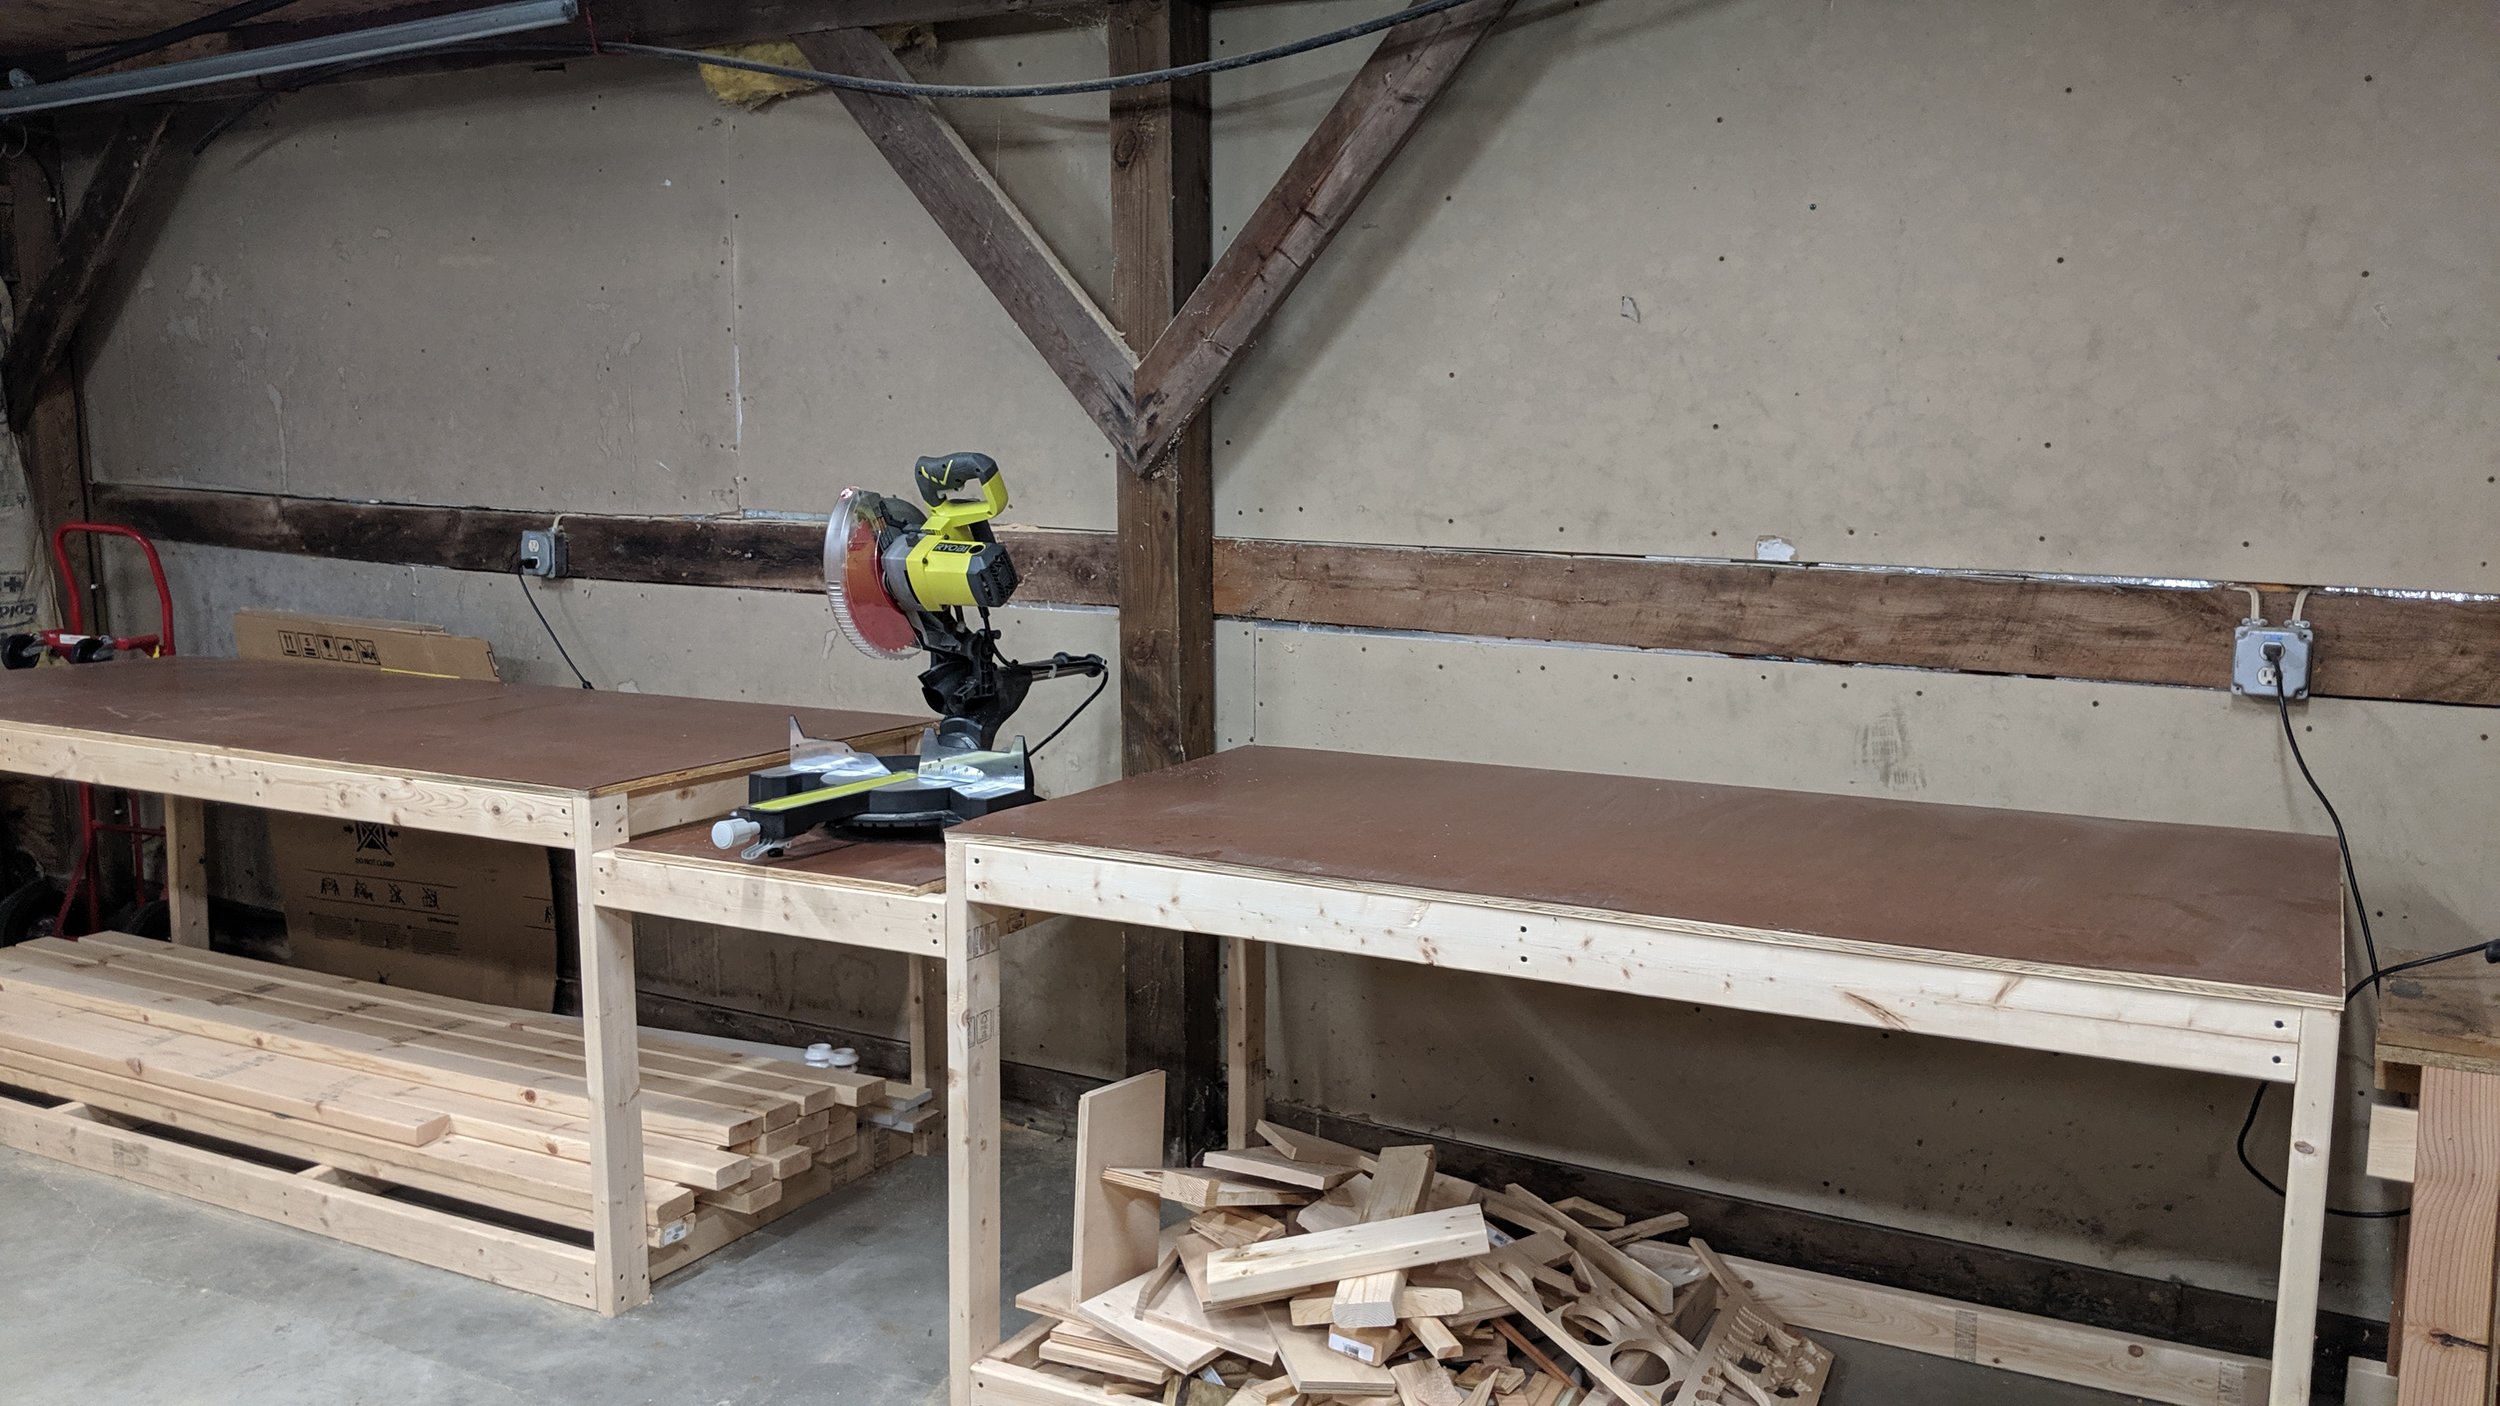
I’ve finished building the two side tables and now it’s time to build the center table where the miter saw sits on top. I need to make sure that the center table is built at the right height. That way when the miter saw sits down on it, all the surfaces line up.


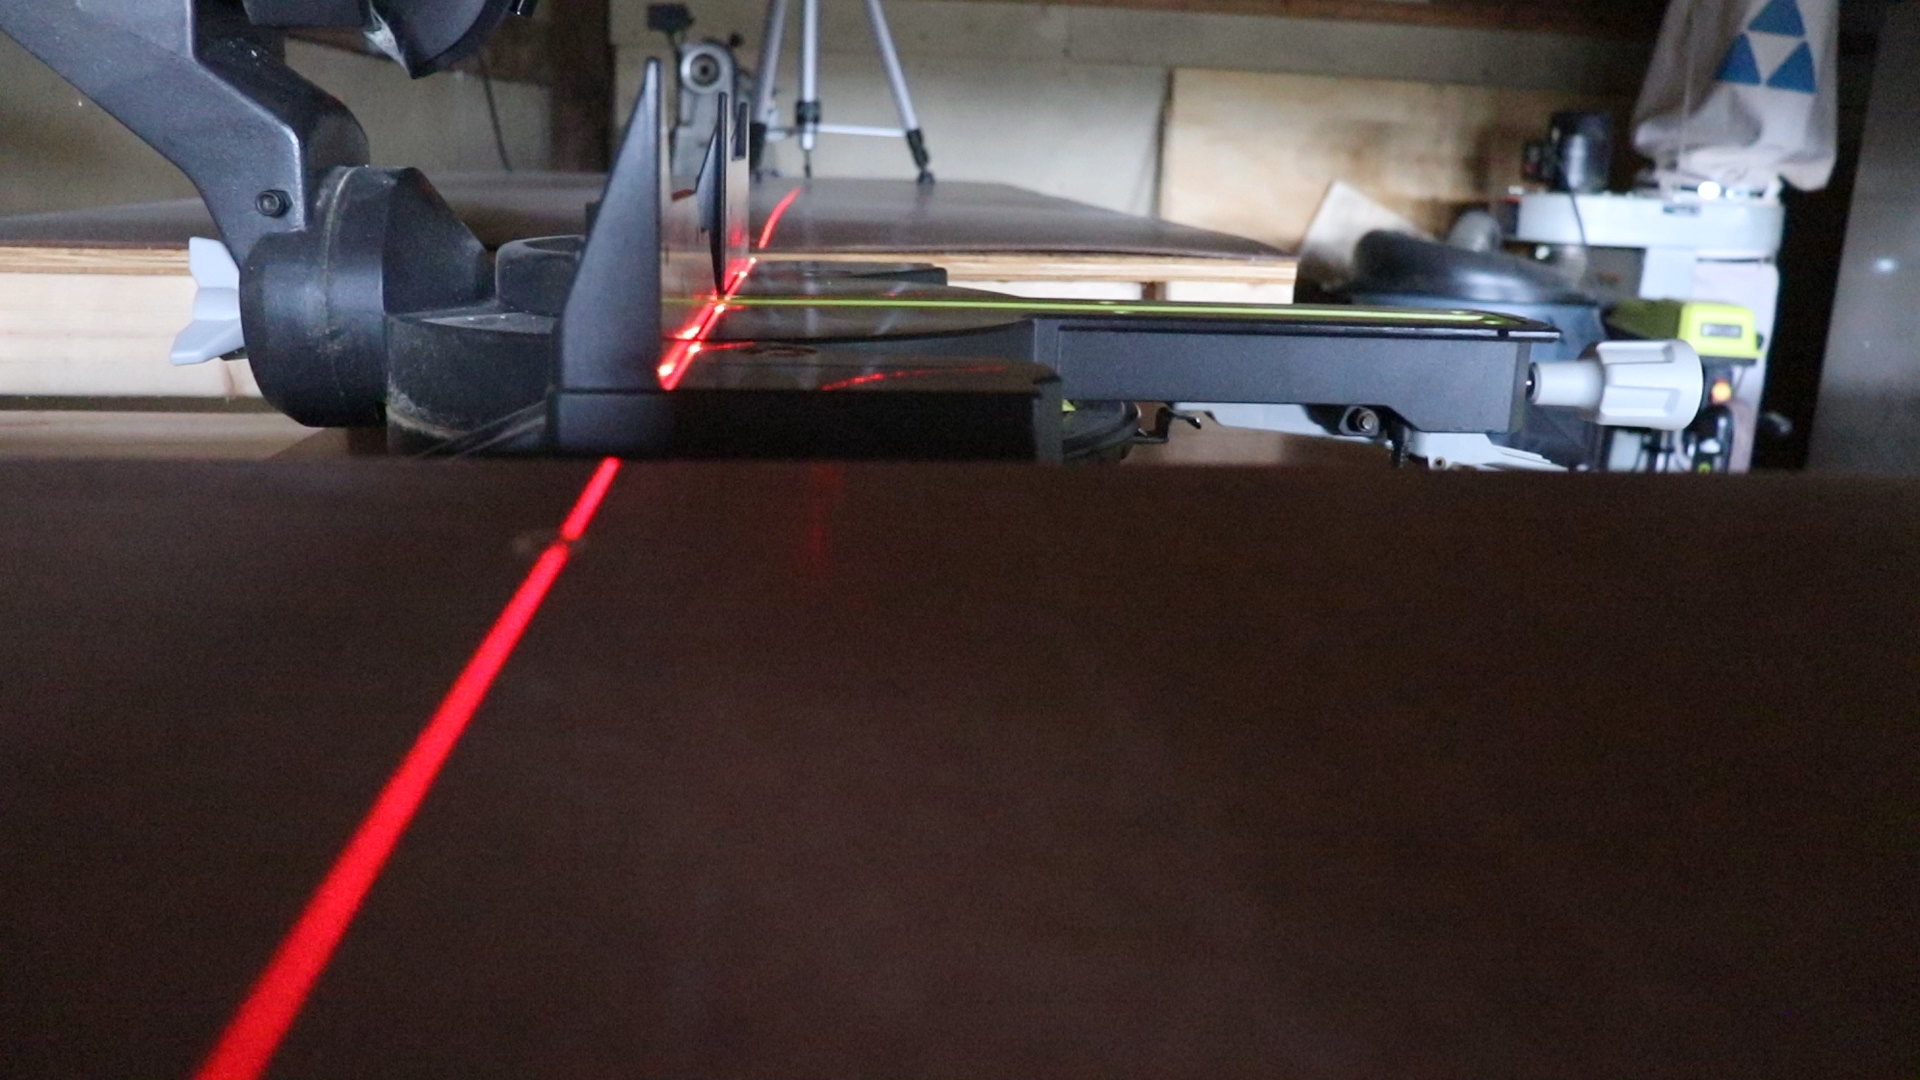
I removed the old screws that were holding the saw to my temporary stand and moved the saw into place. I just bought a really cheap laser line level for my closet shelves and it came in handy for aligning the fence so that it’s parallel to the front edge of the table. I pre-drilled some holes once I had aligned the saw and bolted it into place using some lag bolts. I made sure they were long enough to sink into the 2”x4”s below.


This is just the base table for this miter saw station. I will eventually add features like a fence, stop block system, drawers, and storage.
If you have built your own miter saw station or have suggestions on how I could make this better I’d love to hear about it down in the comments. Hopefully this project inspires you to make something you’re excited about. I’m Zach, and I look forward to seeing you next time!